Showing posts with label Ambush Alley. Show all posts

Thursday, 27 October 2011

Quick Review: FoF Ambush Valley

A day or so ago I received my copy of the Ambush Valley sourcebook for Force on Force by Ambush Alley Games / Osprey. This is the revision of the earlier AAG Ambush Valley offering, to fit into the new Osprey mould.  Despite what it says on the cover (1965-1975) it covers the Vietnam conflict from the advisory period (1963 onwards) and could probably be used through to the fall of South Vietnam in 1975. It is a lovely looking book, paperback with full colour pages, and quite thick (176 pages plus Fog of War Cards).


Unlike the "Enduring Freedom" book, which felt a bit "samey" compared with "Road to Baghdad", "Ambush Valley" is a different beast entirely.  The majority of the book in this case is detailed information on organisation and equipment of all of the various forces involved in Vietnam, Laos, Combodia and Thailand throughout this period.
After a quick introduction, the book launches into specific rules for Force-on-Force for this period.  As well as the usual complement of terrain, civilians etc. the book has a section on boats that enables a riverine game straight out of the box; a nice inclusion.

Then we begin the detailed TO&E info, which runs for most of the book.  There is a lot of meat here, however if you are an experienced Vietnam gamer, there may be very little for you here.  For me, the non-Vietnam stuff (Laos, Combodia, etc.) stuff was new and interesting, but the rest was not new.  As I say, it will depend on your pre-existing knowledge of the Vietnam conflict.

Once the TO&E section is done, there is space for a paltry six scenarios, a page or two on solo play, and then it's "roll credits" time.

To be honest I was disappointed by the number of scenarios, as that is one of the primary reasons I have for buying these books.  The TO&E stuff I can read and find, but the ability to have a ready-to-go scenario to play through is very valuable for me. 

This book has expanded the scope from the original Ambush Valley and substantially beefed up the organisational data included.  However this has come at the expense of removing the campaign system that was present in the earlier version, and there are still only 6 scenarios as there was in the first book.  This was a major shock, with this book following on from "Enduring Freedom" with its 20 scenarios.
I will still certainly use this book as it pulls together TO&E data that I have scattered over half-a-dozen sources into a single handy volume, and it brings the rules up-to-date with the new FoF.
I do regret the small number of scenarios, and the removal of the campaign system.  For those I'll be keeping by version one copy of Ambush Valley close to hand.

If you're new to wargaming Vietnam, this is a must-have. 
If you're looking to game Vietnam with Force-on-Force this is a must-have.
If you are looking for an excellent Platoon-level TO&E guide for the US involvement in Indochina, this is a must-have.

If you are already a Vietnam conflict wargamer, or own the original Ambush Valley, there may be much less for you here than you may expect.

Tuesday, 25 October 2011

Quick Review : FoF Enduring Freedom

A while back I received my copy of the Enduring Freedom sourcebook for Force on Force by Ambush Alley.  This is Force-on-Force's book on Afghanistan from the commencement of hostilities in 2001 to the current day.  It is a lovely looking book, paperback with full colour pages.  Some comment has abounded regarding the cover art.  Earlier placeholder art was in my view better, but Osprey / Ambush Alley have obviously decided to go with this one in the final release.  It wouldn't have been my choice.
From my perspective this book is "more of the same" when compared with the earlier Iraq book (Road to Baghdad).  There are 20 scenarios in this book, most of them seem to trend towards the larger size of game (Full platoons with support on both sides), rather than the earlier small forces we saw in the initial Ambush Alley product.

The format of the book roughly follows the same approach taken in "Road to Baghdad".  An overview of the conflict is followed by explanations of the specific rule elements for Force-on-Force that apply to the current conflict in Afghanistan.

After that we have the 20 scenarios, followed by details of organisation and vehicles for the various ISAF and Afghan forces.  A quite nice part of this book is a guide to uniforms, painting and model selection for the conflict.  It desn't suit my predeliction for 6mm all that well, but it's nice to see in what is essentially a hooby book.

If you've been a follower of Ambush Alley Games and modern wargaming for a while, there may not be a whole heap for you in this book, apart from the scenarios.  I had a vague feeling of "samey-ness" leafing through the book, but to be honest I have not found the time to invest in a cover-to-cover in-depth read.

If you're interested in Afghanistan, it's obviously a must have.  If not, then I'd leave it.
Maybe it's because it's Australian focused, but I think the older Operation Uruzghan book that AA Games issued before the Osprey partnership was a better book, with scenarios more suited to what I'd like to game in the Afghan conflict.

Monday, 18 April 2011

Quick "Road to Baghdad" Review

I'm going to cheat and post a quick review I knocked up for Book Depository.  After I've had a chance to read through RtB more thorough over the Easter break I'll post more detailed thoughts:

The Road to Baghdad is a return to roots for Ambush Alley Games (AAG). Their original game "Ambush Alley" was firmly rooted in the events of the 2003 invasion of Iraq - Operation Iraqi Freedom.

As the first offering from their new partnership with Osprey, AAG have served up a wargamer's treasure for this conflict. The book is 104 pages, soft cover, and full of colour art and photos as you would expect from an Osprey publication.

After a brief introduction, 11 pages are devoted to the an overview of the war, with the timescale stepped out.

After this comes the real "meat in the sandwich"; 19 scenarios for the conflict spanning 83 full colour pages with maps, force lists, suggestions for alternate and augmented forces, and the all important historical outcome. These scenarios are design for use with the Force on Force ruleset, but could equally be used with any ruleset focusing on about a platoon per side.

Finally there is an overall listing for US, British and Iraqi forces to enable further scenario creation, as well as a bibliography of further reading.

If I have one immediate criticism of Road to Baghdad, it is that there is so much information crammed into the 104 pages. Skimming the book it can be difficult to pick individual scenarios immediately, as there is very little whitespace (camouflage space??) free in this book to delimit the individual scenarios and they often run on into each other. The Table of Contents obviously helps here, but this is a lot of content in a compact form.

Force on Force Arrives...Early!

My colleague who sits next to me just came back from the mail area with two packages.
Inside was this:
The books look very nice and are more compact than the A4 printouts I had of the original rules.
More details after I get a chance to have a flick through over lunch.
But for now.....Back to Work!!!

Thursday, 28 October 2010

Force-on-Force Primer Available

The guys over at Ambush Alley have released the Force-on-Force Primer - a series of 6 scenarios for Force-on-Force that you can play interlinked as a campaign, by Piers Brand.

The scenarios are all generic and have examples of how they could be played both for WW2 and the modern era.

And it's all for the princely sum of......FREE!!


Monday, 4 October 2010

Ambush Alley ceases AA & FoF Sales

Ambush Alley has just ceased the on-line sale of their Force on Force and Ambush Alley rules, and related material.  This was a condition of the new Osprey deal, which will see both of these published by Osprey (as a single tome) next year.
At the moment from the AA website, all you can pick up is Ambush Z and the Tomorrow War pre-release.

Before they shut up shop on all things AA/FoF, I picked up a copy of each of the scenario packs they'd published to date:
  • Three Block War
  • Art of War
  • Indian Country
  • Hawks and Wolves
I have to say these have some great scenarios, and they've got me hooked again.

I just have to find the time to get back behind a paint brush again.  I still haven't finished that section/squad of Main Force VC, and all that's needed to get them over the line is some black paint and a drybrush of gunmetal on their weapons!
This week for sure!!!

Thursday, 23 September 2010

Latest Ambush Alley purchases

Well I just picked up Tomorrow's War and Operation Uruzgan from Ambush Alley.
A quick skim of Tomorrow's War and there's a lot of material in there. 
 Like any ruleset attempting to provide a toolkit to model all sorts of sci-fi settings, they've included a lot of content to model your favourite settings.  A lot to consume over the 102 pages....
I should note though the pre-release doesn't contain the "eye-popping" art and photography promised in the Osprey edition, it's still no slouch in the presentation stakes.

Operation Uruzgan also looks excellent.  Now if only Flashpoint or Eureka would ever get around to producing their modern Australian Infantry in 15mm! 
Luckily for the time being; the book has a guide to converting to British and US troops.
In my quick skim I was quite taken by this note at the end of the first scenario, "Render Safe":

For those Australians using Operation: Uruzgan; a humorous mini scenario can be played using this scenario template and substituting the VBIED and the EOD operator for an Army Major trying to locate and purchase a hair dryer for a visiting Prime Minister.....

That's gold.....

Wednesday, 22 September 2010

Tomorrow's War is out and about

The early release pdf version of Ambush Alley's Sci-Fi Rules have just been released :
http://www.ambushalleygames.com/TW.html
You can get it now in the pdf format, or wait until next year for the all-singing, all-dancing Osprey version.
At US$20 packaged with a printer-friendly copy of Force-on-Force, I think this is a pretty good deal, as FoF retails for that much by itself.
Maybe a certain brother of mine might be interested in the PF FoF if I pick up the bundle.....

Tuesday, 13 April 2010

A Little Light Reading

As part of the deal for getting the hallway finished, I took advantage of the ongoing strength of the AU$ vs the pound and picked up some of the fine Too Fat Lardies publications.
Here's what I have waiting for me AFTER the hallway is finished:

Gotterdamerung - Army lists for Late World War 2 in Europe for IABSM
Shadow of the Rising Sun - Army lists for World War 2 in the Pacific for IABSM
Through the Mud and the Blood - Large scale skirmish for World War 1
Triumphant Standards - the InterWar period with Mud and Blood (free with Mud and Blood and covers the fictional 1938 English Civil War amongst other things)


I also picked up the 2009 Christmas and Summer Specials. Included is the picture is my copy of Ambush Valley that I finally got around to binding at the same time.


Through the week I'll be binding some other PDFs that I have. Unfortunately my copy of Force-on-Force will have to wait as it's sealed up in the bedroom with the renovations.

Thursday, 28 January 2010

Turkey Shoot II - Revenge of the Turkeys

As mentioned previously, we replayed the Ambush Alley Turkey Shoot scenario a week later, but this time with a few modifications:
  • Marines were dropped from Recon (d10) to standard (d8).
  • No APC was taken (again).
  • An extra Hotspot was added to the table bringing the total to 5.
The table layout was also a bit tighter than previous.

In addition, this time we had two players (myself and Adam) playing the Regular fireteams, while Brad took the Insurgents again.

With two players as Regular, we opted to allow the situation where we could end up with 2 Fog Of War (one per Regular Player) per turn. 

Part way through the game, we realised that this was a bit of overkill, so we drew two assets (suggested by Insurgent commander Brad to redress the situation we'd found ourselves in) and went back to maximum of one Fog of War per turn.

The Regulars moved forward just fine to begin with.

But with the Fog of War flying thick and fast, the Marines got pinned down in the alley just beyond the target building. 


They were attacked by friendly fire (mortars and air strikes - luckily this A-10 could hit a barn door!),


3 technicals,


and a carload of insurgents.


Just when these threats appeared to have been neutralised, the Insurgents torched the target building (Fog of War "Fire! Fire!" card) , rendering the mission a failure! 


Luckily, while they had been pinned down in the alley,  a secondary mission to investigate hostages being held in the area had been radioed through.


So the Regular teams quickly set out to attempt to free them, despite now being low on ammo ("Praise the Lord and pass the ammunition" Fog of War). 


After assaulting the building, the hostages were rescued, but by this time each Marine fireteam was nursing casualties, with one man dead.


We finished the game there because we were over time, but hopefully it was a very enjoyable game for all!  Especially Brad and his team of pyromaniac Insurgents!


I'll be starting to shoot a Tin Pot Little Country comic for this engagement over the next few days.
I'll put a quick post up on this blog to let you know as the pages go up on TPLC.

Wednesday, 27 January 2010

Turkey Shoot - initial run

This is a report on my initial run of Turkey Shoot.
We've run the game subsequently with some changes after this run through, and it was a completely different game.  More details on that coming soon...
Okay, so back at the game on the 16th Jan:
Turkey Shoot is a scenario where a squad of Marines must escort a sniper team to a position where they can engage targets "off table".  The Marine Squad must keep the team alive for 3 turns on the roof, and then exfil off the edge they started at.

The Scenario as written has a full squad of US Marines (3 fire teams and a squad leader) protecting two snipers and accompanied by an LVTP7.
I didn't have a suitable APC available, and it seemed overkill (more on that soon) so we dropped it from the game.  It should also be noted that the Marines themselves were Recon Marines.  This meant that they were rolling a d10 rather than the standard d8 for trained troops.
Even without the APC we were soon to find that this scenario would be a whitewash for the Regular player.
The Regular team stepped off and engaged an Insurgent RPG team on a nearby building.  The threat was neutralised, but during the shooting roll, a Fog Of War card was triggered!  "The Colonel says what?!?" meant that the Regulars were pinned in place for a turn, unable to move forward.

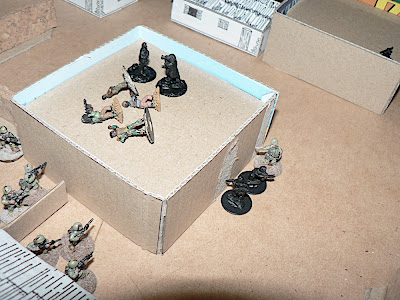
In the mean time, the Insurgent player took the opportunity to occupy the target building....

And prepared to spring a trap on the Regulars....


However, this where the Recon Marines stepped up!
They demolished the ambush on the left hand side of the road, leaving one man standing.

In a later turn, this one mad insurgent managed to skirt around the fireteam that had engaged his group to charge another team from behind....

He was quickly dispatched.

Meanwhile, on the right hand side of the road, the Marines in position there had achieved a similar result.

As you can see, machete-wielding Insurgents are hardy indeed!

At this point the Insurgent group in the Target Building began engaging the Regulars.

Their shooting was inaccurate, and over the next couple of turns, their numbers were whittled away from 6 down to 2.


The Insurgents had received some reinforcements by this stage, but due to a lucky break on the Fog Of War, the "What's this made of....Swiss Cheese?!?" card rendered them vulnerable to the Marine Fireteam  holding that arc.


It was around this point that Brad failed the rolls to bring 21 fresh insurgents onto the table!


However, luck was not completely against him, as another Fog OF War ("Contact!") provided him with another squad of Insurgents. These, however, were still unable to cause casualties on their Marine foes.


At this point, the Marines reached the building and began clearing it:


After the building was cleared, the sniper team swung into action and began to engage their "off-table" targets.


Some further reinforcements for the Insurgents was "too little, too late"....


...and the Marines exit the area with no casualties!


In the post game wash up, we believed that the Marines were too strong (and we didn't even use the APC!) and that at least one more insurgent hotspot (there were only four) was required.
In the second game played recently, we dropped the Marines to "Trained" (d8) and added an additional hotspot to bring the total to five.
But more on THAT game for another post!

Sunday, 24 January 2010

Just had a cracking game!

Just in the middle of packing up from another Ambush Alley game.
We played Turkey shoot again, but with some modifications.
The previous play last week (which I still have yet to write up) was a bit of a walk in the park for the Regulars.
This week we down-scaled the regulars and became a far more challenging proposition.  And a lot of fun!
This week's game is going to get a proper write-up.  The game from last week is now going to receive an abridged AAR.
Stay tuned.....

Saturday, 9 January 2010

Final Christmas Loot

My in-laws gave me the gift that keeps giving - cash!

I have been able to get a copy of Ambush Valley, which I've printed but haven't had time to read it yet.
Looks very good though.


I've also renewed my Special Operators Group membership with Ambush Alley Games, and I have three diecast UH-1Cs coming from Flying Mule to provide some air-mobility or dustoff for my Vietnam games.


Thanks Garry and Kathy!
It's going to be a BIG year!

Tuesday, 21 July 2009

I Ain’t Been Shot Mum! – a preplay review

As always; many forces are conspiring to prevent me from gaming or blogging.  However a friend of mine asked me what I thought of IABSM, as he has a copy of Sharp Practice.  I sat down and put together some thoughts on what I think from reading the rules.  Obviously these opinions may change when I get it to the table…….
 
Preliminary Notes
The first conclusion I've come to is that I think these rules are going to be more for my own solo gaming enjoyment. I cannot imagine them getting used in the competitive environment of club or tournament gaming. They require the players to come to a gentlemanly agreement on a number of points, and my personal experience is that many gamers can be anything but "gentlemanly". I can see play in a club scenario with a referee, but you'll need to have a thick hide to deal with the whinging when things don't go people's way.

Those with a fixed-move, IGOUGO background may struggle to come to grips with how to manoeuvre. The thing is that with more play, people will adapt themselves to more realistic manoeuvres on the table, and end up with less requirement for a referee, but it remains to be seen whether your average IGOUGO gamer would stick with it through the learning curve. My personal belief is that IABSM appears to provide a good representation of the friction of battle and the decisions of a company commander.
How does it work?
Units start the game represented as oval card blinds on the table. These can move or spot. Players may also have a number of additional blinds that represent small recce parties. Once spotted these disappear, but until then they can be used to spot enemy units. Players get to move their blinds when their "blinds move" card (one per player) comes up. Spotted units are put down on the table in place of the blind.
The turn ends when the Tea Break card arrives.

Once on the table, the platoon cards are inserted into the deck, and the platoon can move and shoot when its card comes up. Each section of the platoon is given a number of initiative dice based on the quality of the unit (SS and Paras have more dice than Volksturm). These dice are used to move, spot or shoot. Dice can be reserved when the platoon's card comes up to be used before the Tea Break arrives as an interruption. As a result, ambushes are very well catered for (unlike a certain popular WW2 ruleset....).

Combat involves shooting dice being rolled and totalled and compared against a table. The result on the table gives a number of casualties in the target unit and also whether there is any pinned or suppressed. Casualties are separately diced for to determine whether they are dead, wounded, or a near miss.
Close combat involves what (at first glance) appears to be a complex set of modifiers. This is one area where I am not sure how exactly it will work on the table.

As well as the platoon cards, there are also Big Men on the table. These officers and NCOs (not every officer or NCO is a Big Man) have their own cards in the deck and can be used to activate nearby units or take actions when their card comes up.
 
Final Thoughts
Experienced IABSM players will probably throw their hands up in the air at the above descriptions, but all I’m trying to capture is what I’ve gotten out of my couple of flicks through the rules.
 
Friction appears to work really well via the use of blinds for movement of units until they are spotted. The card-driven mechanic and dice roll movement further enhances the uncertainty that the commander has to deal with. When pushing your troops forward, you will need to set realistic objectives. As the M&M podcast suggests, this game is no race for the bridge where the player that goes first will always win.
 
It should be noted that at the end of the rules, a guide is given to three rough scenarios to play through to learn the rules, introducing the infantry first, and then slowly moving to include artillery and armour.  The rules also cover sections on Aircraft and Anti-Aircraft, and a section on refereeing and solo gaming.
What am I doing with them?
I'm going to be using these rules for 6mm gaming at the moment because that's my chosen scale for anything greater than a platoon or two. In addition, with B'Maso! I think they have a really role to taking in replacing AK47 (for my 6mm) which I haven't been happy with.

For a couple of platoons or less, I'm going to be using 15mm and Ambush Alley Game's Force-on-Force or Ambush Alley (depending on the scenario and the force composition. These are a great looking set of rules that they've deliberately targeted at World War 2 and Moderns from the start.  More on them soon….
Other Gaming Directions
Napoleonics have never appealed to me previously. I think large blocks of men manoeuvring has been dead boring. Also I don't think I understand the period and its challenges well enough. However, the concept of Sharpe Practice being more of a skirmished sized game does sound interesting, particularly with the chance to recreate characters like Flashman and Sharpe. It's definitely on my list now, but I need to complete what I'm trying to do with WW2 and Moderns before I push on to anything else.

I'm also trying to resist getting into colonials (which have always held a great attraction for me).  I've always intended to use either the Sword and the Flame (which I would need to purchase) or the Space:1889 Soldier’s Companion (which I have already) for this. The benefit of Soldiers Companion is that it's a quite good set of colonial rules that also has sections to cater for Victorian sci-fi elements like martians, steam tanks and airships.  Plus the only outlay is on figures!

Tuesday, 14 April 2009

Easter DPM attempt

I didn't get a lot of painting done over the Easter long weekend.
I took some figures and paint to my in-laws, but found I wasn't in the mood for painting most of the trip.
I did, however, get to try out painting some DPM uniforms on some of my insurgent leaders.
I'm still getting the hang of it, but I'm not dissatisfied with the results.  Particularly the trousers on the right.

Wednesday, 8 April 2009

QRF HMMWVs - M1025

Here are the bits you get with the M1025 HMMWV from QRF.


Here are the assembled views. I'll apologise for the big blob of BluTack holding the Mk19 on, but I couldn't keep it in place any other way. It should glue on a fair bit nicer. There's a little depression on the roof (if you zoom the photo above) to place the upright on the weapon mount into.


Tuesday, 7 April 2009

QRF HMMWVs - M998

I wanted to get some HMMWVs for my US forces for my Day of the Ranger games.
I needed some unarmoured M998s and the M1025 weapon carriers, rather than the newer M1114 up-armoured HMMWVs. QRF has a wide range of Humvee variants, so I ordered an M998 along with M1025s with a .50 cal and the Mk19 AGL.
Here is the M998 (temporarily stuck together with BluTack):


This was the generic troop carrier variant. Here are the bits you get:


Some more shots (click for the full size):


As you can see in the pictures, the model needs a bit of a clean-up; particularly around the windows.

And finally the comparison. I think I might need to base them up to get the height right vs the figures. It would mean less wear and tear as well, I guess.

M1025 pics coming soon...