Saturday, 21 June 2008

More Cannon Fodder Militia done

I've painted up more of the same pose.

I am reasonably happy with how they are turning out.

I have the additional US figures to complete the ranger chalk now, and I've picked up a camera crew for a future scenario.
I'll post pics later.

The brighter paint on the militia seems to be working out, and I'm now using a different technique on the skin. The hands still don't have enough contrast against everything else, but the faces are working better now.
Time to try the technique on some others now - I think I'll be painting some of the Peter Pig figures next.

Monday, 16 June 2008

Another attempt

This photo looked okay last night, but in the cold light of day, it's rather substandard. I'm playing around with different techniques for the photography, until I find something that works.
I've used brighter colours on the model on the advice of Eltnot and others. I think that the colour isn't to bad, but it hasn't really fixed my issue with facial contrast. Not sure if it can be fixed.....

Monday, 9 June 2008

First Militia

Painted the first Cannon Fodder figure today.

A little rough, but not too bad. Worst part is the flesh - it's difficult to get contrast. Might need a lighter drybrush, but my I'm not sure my feeble painting skills are going to be up to the task.

Wednesday, 4 June 2008

Nazis and Adventure!

I got in some Flames of War German vehicles from MilSims yesterday.
There were some bikes with sidecars in metal and some resin Kfz15s and Kfz70s that I needed to kit out my 500 point Aufklarungsschwadron.
As I was looking at the models, it occurred to me that the models I have (particularly the bikes and infantry), with the addition of these from Brigade in the US, would make for some rollicking pulp gaming!
I also have some suitable stormtroopers from Eureka that could be used as well.
I'm going to have to hold off until my 6mm AK47 and the Ambush Alley stuff is fully painted, but once that's done, it'll be time to grab your fedora and swing into adventure!

........No, I haven't been to see Kingdom of the Crystal Skull yet.......

Sunday, 25 May 2008

Done

The infantry I have are now done; including (for the first time ever!) basing.

Now off to the Eureka site to order the SAWs and extra grenadier that I need.

Thursday, 22 May 2008

Boots

Damn.
The "Font of All Knowledge" (wikipedia) has an article on the First Battle of Mogadishu that shows that I have the boots wrong.
Here is an image of Chalk Four showing the sandy coloured boots.
And also, the crew of Super Six Four.
Looks like I'll have to redo the boots in the sandy colour and make the base colour of the basing darker to provide contrast. I think I'll run a test on swapping the current two colours (boots and ground) and adding some fine sand to the base to see how it all comes together.
One final note, the Kommando Khaki looks a lot more green against the Goblin Green in the new figures I've just finished painting. I think I'll need to go back and add additional paint to attempt to provide the required contrast.
Photo below looks better than I thought it did last night though.

Wednesday, 21 May 2008

More 15mm US

Well, I've completed all of the 15mm US that I have.
The photo below isn't the best, but I needed to get it up to prove that it's done.

I changed to a sandy colour on the base, and I'm planning to add some sand, etc. to the base to bring it up to scratch.
I've never based anything before!
When I originally painted the first figure, I gave him sand coloured boots on the brown soil. My intent had always been to use Bestial Brown for the boots and sandy soil, and that's what I've done with these. Not sure about this now - I think the sand boot looked better. Need further research on the issue boot at the time.

I still need to get two M249 SAW gunners and another M203 grenadier to complete my Ranger chalk, and then it will be time to try to get the militia painted..........

Wednesday, 14 May 2008

3-pattern Attempt

Had a crack at the 3-pattern Desert BDUs tonight.
Pretty chuffed with how it came out; compared with my normal painting standard.

The colour scheme listed out below. All of my paints are Games Workshop because that's what I have kicking around at home after my early days of playing 40k.

Dry-brush of Kommando Khaki across most of the model.
Very light dry brush in selected areas of Goblin Green (for the green areas).
Thin lines of Scorched Brown using a fine brush in selected areas.
Webbing in Catachan Green.
Hands and face in Dwarf Flesh.
Rifle in Chaos Black with a Boltgun Metal drybrush.
Boots in Bestial Brown.

Monday, 12 May 2008

Uniforms

US troops in Somalia were dressed in the newer 3-pattern and older 6-pattern (chocolate chip) Desert Battle Dress Uniforms.
I'm going to be trying to paint the 3-pattern uniform on my rangers. Mainly because it's simpler, but also because on a 15mm I like the reduced number of colors.
If you're one of those crazies who want to paint a chocolate chip scheme, the amazing Matakishi's Tea House has an instruction on 28mm that makes it seem easy.

Tuesday, 6 May 2008

Update

Well, despite my best intentions, the blog has been quiet for a little while.
I have been doing some things in the background. The 6mm stuff hasn't progressed at all, but I have gotten copies of the Ambush Alley Rules and expansion books. I'm taken with the scenarios, so that game has been receiving all of the focus.
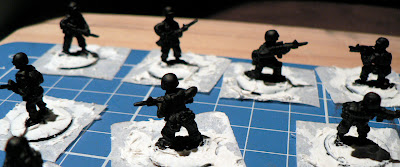
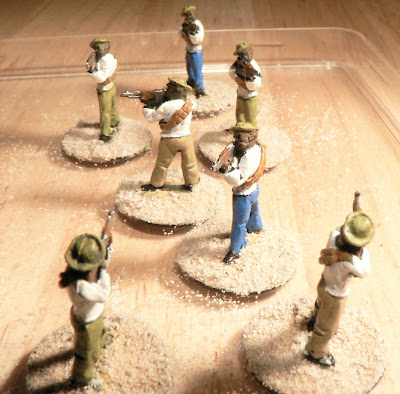
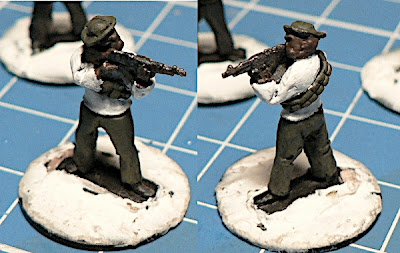
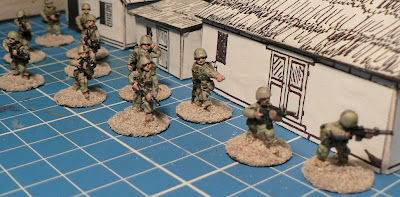
Re-basing my 15mm AK-47 figures has been the main focus.
I'm still trying to get a fix on it, but I've gotten a few done now. Just need to get on with the painting!

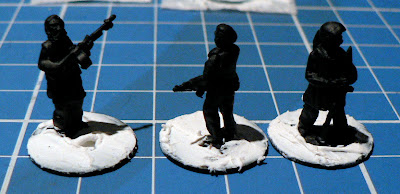
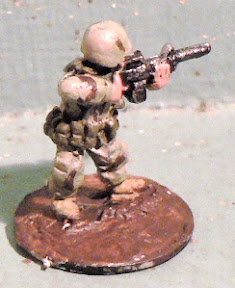
What I've done is glue the miniature to a washer, then backfill with acrylic filler. Having done this for a few figures now, I think the best way to go is simply to use the filler (or a thick glue) to attach the miniature to the washer initially, rather than backfilling.

The use of masking tape on the bottom of the washer was a relevation I picked up from the web - I used cling wrap when I was glueing the figures to the washers, and it wasn't very successful. I had to make sure that I separated it before the bond got too strong. The tape however seems very good.

I'll need to look at other options for the filler material; the filler is still tacky 48h later!